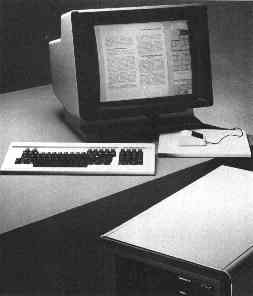
A PERQ T-2 Workstation
NOTE: To add information to this FAQ, please contact Bill von Hagen. The author of the text version of this FAQ, R. D. Davis (rdd@perqlogic.com) is no longer with us. Thanks for all your hard work, Bob - you were great! The HTML version of this FAQ, along with some minor editing and the addition of a graphic or two, was done by Bill, for everyone's convenience.
This FAQ deals primarily with the POS operating system, although there are some mentions of Accent, PNX and FLEX. If there is something that you'd like to see added to this FAQ, or if you notice any errors, please send e-mail to Bill.
All of the other known PERQ operating systems require that the hard disc be formatted using POS. Although the PNX operating systems cannot co-exist on the PERQ's hard disc along with POS and Accent, it is still necessary to format the hard disc using POS prior to installing PNX. I'm going to guess that this also goes for FLEX, since FLEX can reside on the same hard disc as PNX.
If you are running PNX, or FLEX, and never experienced a hard disc crash, then you may never need to know anything about POS, unless, however, curiosity gets the better of you. PERQ disc crashes can, and will, occur, particularly if one's PERQ is using certain types of 5-1/4" hard discs.
It is only during the boot process that the PERQ's diagnostic display system (DDS) contains valid information about the status of the system. After the system has successfully booted, a program may make a call to SetDDS, which will set the DDS to whatever value is specified by the program.
Users should be aware that there is a DDS bug that possibly can cause the display to be one digit off while the system is being booted. So far, it does not seem to appear very frequently.
The file SYS:Boot>disk.params contains a list of disc drives that can be used with a PERQ T2. These are all MFM, ST-506 type hard discs (with the exception of one ST-412 that requires a different controller board). Additional MFM disc types may be added to this file, on one condition: do NOT add them to the end of the file; place them anywhere *before* the last drive description.
It is possible to replace the PERQ-1's 14-inch hard disc with an 8-inch hard disc without too much difficulty. This requires some hardware hacking; I have a document that describes the theory of this, but there are no schematics. I did hear that some PERQ-1 systems were modified to use a 5-1/4-inch hard disc, but I have no information on this.
Yes, if you have a PERQ-2, T2 or T4. One caveat: the second drive cannot be used with POS. However, POS is used to format the drive before Accent or PNX can be used. There is also some information about this addition in the PERQ-T2 Service Guide.
      Double Disc Setup:                  * this cable has 3 connectors, unshown
      is connection to disc 1
      ------------------------------------
      |                                  | 34-pin daisy-chain cable *
      |                               JC |=====================
      | Disc 1 with Disc interface       |                    !
      | board attached (shown).          |                    !
      |                                  | 20-pin             !
      |                               JD |---- to disc 1      !
      | Drive Select in                  | 20-pin             !
      | first position                JE |---------           !
      |                                  |        |           !
      ------------------------------------        |           !
      |           !
      |           !
      ------------------------------------        |           !
      |                                  |        |           !
      |                                  |=====================
      | Disc 2                           |        |
      |                                  |        |
      |                                  |        |
      |                                  |        |
      | Drive Select in                  | 20-pin |
      | second position                  |---------
      |                                  |
      ------------------------------------
Daisy chain cable: This is a flat straight-through connected cable; doesn't get "twisted" like the daisy chain cable for PC's. For example, if ribbon cable is laid flat out, and one socket has the connectors showing, the others will also; If one socket is face down, they will all be face down with no pin connectors showing.
Notes:
Only one controller (disc interface board) is needed for two drives.
POS will only recognise the first drive, except for the POS utilities which are used for disc formatting, etc. The first drive (or only drive) in a PERQ should be jumpered as the first drive (either a 1 or a 0, depending upon manufacturer's notation) and the second drive should be jumpered as the next one.
Remember that if using a drive that is not in the disk.params file, and you add it to this file, do not place it in this file as the last line! The EOF marker in this file must not be disturbed!
In order to do this, you will need several programs that were not normally distributed to PERQ customers. These programs are: BadSector, DiskTest and NewPart. Note that there were two varieties of the DiskTest program: one was primarily for internal use at PERQ Systems and the other was released to some customers. The version released to customers was a crippled version of DiskTest, and could only perform non-destructive tests. The version that you will need to use is the version used internally at PERQ Systems.
The following steps are necessary to format a disc and make it ready for use. The following example is for a PERQ-T2 with a Toshiba MK-56 hard disc.
NOTE: You will need to make some minor changes to some of the following parameters if you are using a different disc drive. the parameters that you will need to change should be self explanatory, such as the number of heads, cylinders, etc.
In order to format the disc of a PERQ-1 or a PERQ-2, a few other things may need to be done differently; if so, please notify me and I'll add these to the next FAQ. For example: Does the 14-inch Shugart use write precompensation? Are there some utilities mentioned below that won't work with a PERQ-1 or PERQ-2?, etc. If you've successfully reformatted and partitioned a PERQ-1, or PERQ-2, system please send a note explaining what, if anything, you've done differently.
Boot the system from a boot floppy, fast-boot floppy or auto-boot floppy.
Dismount the boot floppy:
> dis f
Insert a load floppy and mount it:
> mo f
Run the badsector program to check the hard disc's bad blocks. If a bad sector map is not found, you will need to tell badsector which sectors are bad, manually (you will need the factory disc defect list for this). Use the help command to see what other commands are available.
> badsector
The bad sector map must be read into a buffer if it exists:
CMD> readmap
List the bad sectors and compare these, if any, with the defects listed in the list provided by the hard disc's manufacturer. If they match exactly, go to the last step below, the 'q' (quit) command.
CMD> li
Insert the known bad blocks into the bad sector map using the defect list.
CMD> insert
Before you can actually insert the bad blocks into the map, you will be prompted for the type of disc drive that you are using (in this example, a Toshiba MK-56 is used). If the type of drive that you are using is not listed in disk.params, you will need to press [RETURN] and enter all of the disc parameters manually.
Enter disc model or press [RETURN] to enter other parameters: mk56
You will also need to answer the following prompt. You will normally enter 'b' to enter bad spots by byte (4 digits) as listed on most disc manufacturer's defect lists. You will then be prompted further (not shown here... will be self explanatory when you go to do this) for the bad sectors.
Enter bad spots by byte or sector? [B or S]: b
After you have finished entering the bad sectors, continue with the following to list the bad sectors in the buffer to make sure that you have entered them correctly:
CMD> li
Write the bad sectors from the buffer to the bad sector map:
CMD> writefile
Write the bad sectors to a text file named BadSectorFile.Text (or whatver name you want to give it), so that you can read or print out this listing later.
	  CMD> prinfile
	  File: BadSectorFile.Text
Quit the BadSector program:
CMD> q
Run the DiskTest program, Note that running format with checking on is slow; running format with checking off, and then using scan, achieves the same results, and is faster. The 'help' command may be used to obtain a listing of commands.
> disktest
Tell DiskTest what area of the disc is to be formatted. These numbers depend upon the disc type and upon whether pre-compensation is used. Again, these parameters are for a Toshiba MK-56 drive.
COMMAND> area r,1,829
Tell DiskTest that it is permitted to proceed with something that can make permanent changes to your disc:
COMMAND> unsafe
Proceed with the format. This will take a while, so take a break. Fix a cup of tea and grab a handfull of cookies to snack on (or, if you're Bill von Hagen, have a cigarette or two), order a pizza to be delivered and wait for it to arrive, then go back to the PERQ so you can watch the little boxes appear on your screen as the disc is formatted:
COMMAND> format
When the format has finished, scan the disc for errors:
COMMAND> scan
Quit the program. The disc has been formatted.
COMMAND> q
Run NewPart to initialise the disc drive, give it a name, and partition it. If you are running an older version of NewPart, you will need to tell it what type of drive you are using. If using the newest version(s), it will guess the type of disc drive automagically.
> newpart
Initialize the drive and give it a name:
	  CMD> devinit
	  [no] y

	  Enter dev. name> SYS
	  [no] y
At this point, you are ready to partition the disc. Refer to the next section for information on how to do this.
Use the NewPart program instead of the Partition program. If you are using an older version of NewPart, you will need to specify the type of hard disc, or enter the parameters for the disc. If using the newest version(s), NewPart will guess the disc type automagically. Use the 'help' command to obtain further help with using NewPart.
> newpart
After selecting the disc type, if necessary, create the necessary partitions. This example is for a partition named Boot with 10,080 blocks. Use whatever partition size you wish, with the following restrictions: the partition must contain fewer than 32,768 blocks and it must be a number which is the ending of a cylinder boundary. Don't worry too much about the number that you enter, as far as the cylinder boundary goes; if you enter a number that is incorrect, NewPart will suggest the nearest numbers which are the endings of cylinder boundaries. If you have less than 2MB of memory, you should keep the size of partitions 10,080 or fewer blocks ...unless you want to wait a l...o...n...g time when you use Scavenger.
The following creates the partition, initialises the pages and then tests the pages:
CMD> createpart/initpages/test Boot 10080
Quit NewPart:
CMD> q
NewPart will prompt you to find out if you want the disc re-mounted. You should normally respond with yes, the default; just press <RETURN>.
Destroying partitions is even easier; however, you must start with the last partition created. You will be prompted to verify that you actually want to destroy the last partition. Respond with 'y'.
CMD> destroypart
Scavenger to the rescue! Run Scavenger for the partition where the problem exists and answer yes to to the prompts including, and following, the one that asks if you wish to rebuild the directories.
	*** WARNING: Do *NOT* run Scavenger from the partition being     ***
	*** scavenged, as errors may result which could possibly make    ***
	*** your hard disc unbootable, or at the least, could cause some ***
	*** strange errors and noises.  For example, when scavenging the ***
	*** present partition, Scavenger may abort and crash the system; ***
	*** when you attempt to re-boot, you'll hear that "grinding"     ***
	*** of the hard disc re-calibrating.  It may, or may not,        ***
	*** re-boot.  If this happens to you, and you do get it to       ***
	*** boot, there may be some disc damage that you'll need to fix! ***
	*** NOTE: you cannot use Accent unless you have a EIO or OIO ***
	*** board installed in your PERQ.                            ***
First, you will need to create two partitions, one for the Accent OS files and one that Accent uses for paging. It matters not what you name the partition used for the OS, but you must give the paging partition the name of 'paging'. The minimum size needed for the paging partition is 10,080 blocks, and a size of 15,000 blocks is preferable.
The next step is to load the Accent files onto your hard disc. Although Accent can reside in parts of your hard disc that are beyond the reach of POS, you still need to load these files into a partition that POS can Access (unless you already have another version of Accent running on your hard disc, in which case you will need to use the BindBoot program provided with Accent). If you have created a partition beyond the reach of POS, you will see a message that says "Using partition relative fillers" (or something like this).
Use BindBoot (this is for the POS version) to make the partition bootable. The following example is for use with a 'b' boot on a PERQ-T2:
      Existing boot file: Accent.Boot

      Hard disk selected.

      Which character to boot from: b

      System b-boot is unused.

      Interpreter b-boot is unused.

      System or Interpreter [S]: <press return>

      System b-boot disk address = nn

      ***                                                               ***
      *** Before answering the following question, refer to this chart. ***
      ***                                                               ***

      PERQ model             Answer to the following prompt:
      ----------             -------------------------------
      PERQ-1 (with 1A CPU)   Accent.PERQ1A.MBoot
      PERQ-2                 Accent.PERQ2.MBoot
      PERQ-T1                Accent.PERQ2.MBoot
      PERQ-T2                Accent.T2.MBoot

      Existing boot file: Accent.T2.MBoot

      Hard disk selected.

      Which character to boot from: b

      System b-boot disk address = nn

      Interpreter b-boot is unused.

      System or Interpreter [I]: <press return>

      Interpreter b-boot disk address = nn

      Existing boot file: <press return>
This is fairly self-explanatory; run the Accent BindBoot program to see for yourself. In order to create a bootable Accent partition that is outside the range of POS, it is necessary to use this program.
Under POS, there is a program named Undelete that can be used to undelete deleted files. Note that the longer you wait to undelete a file, the lower your chances are of undeleting it; that is, if you've performed many disc writes before using Undelete.
Yes. You'll need an appropriate streaming tape drive (an Archive QIC-2 drive that uses DC-300 tapes; further specs for the required drive will be included in a later FAQ.) and, unless you have a Multibus board, you'll need to get out the wire-wrapping supplies and wrap your own board, assuming that you have a PERQ wire-wrap board that fits in the card cage. If you don't have such a board, you can always tap into the wire-wrap connectors on the PERQ's motherboard/backplane. Schematics are available, but only request them if you are sure that you can undertake this project and know what you're doing. I've done it, and it wasn't too difficult. Beware that if you make a mistake, you could fry something that you don't want to fry, and you could kill your PERQ.
For those who do have a tape drive and controller:
Streamer tape drive software: there are basically two, very similar, programs that you can use: Stut and Stut2. Stut2 is just a version of Stut that I modified to write the directory listings of a tape to a file.
The streamer tape drive is used mainly to copy entire discs, or partitions, to a tape. However, it can be tricked into copying only a subdirectory if you tell Stut (or Stut2) that the directory is a partition. You cannot, unfortunately, use a similar trick to restore data to a subdirectory on the hard disc.
Each DC-300 (or DC-300XL) tape will hold a maximum of about 20 megabytes of data, no matter what the length of the tape is.
WARNING: Backing up, or restoring, data using the version of Stut provided with Accent S5 is not reliable. If the partition to be backed up is accessible by POS, or if you have another version of Accent on your machine, by all means use the other versions of Stut. Otherwise, you may be in for a lot of error messages, such as those referring to buffer allocation problems, errors reading buffers, etc. Don't be misled by these errors into believing that you are using a bad tape! This problem normally occurs with very large files, such as the SPICE LISP core file.
IMPORTANT: Prior to using a new tape, you should use the erase command to remove any glitches that may have been put on the tape by stray magnetic fields.
Additional information on other tape drives: there were also some tape drives (9-track) used with the PERQ's GPIB port and for a MultiBus. Other than the software, and the name of the manufacturer of the interface, no further information seems to be available.
Yes, use the programs (again, these are programs not supplied to most PERQ Systems customers) named Duplicate, DupBoot, and PNXDup. All three of these run under POS.
Duplicate is used to duplicate either RT-11 format floppies or PERQ POS and Accent file-system floppies (except for "fast-boot" floppies).
DupBoot is used to duplicate boot floppies, including the "fast-boot" floppies.
PNXDup is used to duplicate PNX file-system floppies, including the PNX boot floppy.
There are primarily two alternatives here (although other varieties of UNIX are rumored to exist for PERQs): PNX and QNIX.
PNX is a completely separate operating system that cannot co-exist on a hard disc with any other operating system. This is a version of UNIX from ICL that is based on a combination of AT&T System III and Version 7 UNIX. The newest versions will not run on a PERQ-1.
QNIX is a UNIX environment that runs under Accent and uses it's own separate microcode. It can run in an Accent window alongside other Accent programs, as well as alongside the SPICE LISP environment. This came from Spider Systems and is based upon AT& System V UNIX.
Stray magnetic fields from the monitor can do some things, that aren't very nice, to the data on your hard disc. If you still insist upon abusing your PERQ in this manner (as I do :-), then you should periodically run a non-destructive re-format on your hard disc, to avoid data-corruption. Even if you don't keep your monitor sitting on top of the PERQ chassis, you should still run this from time to time. Basically, the non-destructive re-format reads all the data from your hard disc and writes it back. It is a good precaution to take against disaster!
      ***                          CAUTION                                    ***
      *** This is an example for using a Toshiba MK-56 hard disc.  You will   ***
      *** need to substitute the appropriate parameters for the disc drive    ***
      *** that you are using.  Refer to the section of this FAQ for           ***
      *** installing a new hard disc, then come back to this.                 ***
Another CAUTION: Use this on PERQs running PNX at your own risk! I've never tried doing this to a system runing PNX. However, it would seem to me that this should not cause any damage to a PNX filesystem, but I can't be certain. Please don't attempt to do this unless you have a good backup! :-)
WARNING: Be very careful what you enter, as this has the potential of hosing your hard disc's data if you make a mistake.
How to run a non-destructive re-format on your hard disc:
      > disktest

      CMD> area r,1,829

      CMD> unsafe

      CMD> reformat

      CMD> q
The Pepper editor is similar to the EMACS editor (but has far fewer features and capabilities), and comes in two varieties: the standard Pepper editor from PERQ Systems and the version from Igloo software that comes with IDOCS (this version uses different key bindings and, to an EMACS user, is more difficult to use).
If you have SPICE LISP, you can use the Hemlock editor, which is a very nice implementation of EMACS.
3Prose, Mint and QED.
3Prose, loosely based on DEC Runoff. This is for creating text-only documents. It is said to be possible to use multiple fonts with this, but no one seems to recall how to do this. This is from PERQ Systems. No written documentation appears to exist, other than the guide that I wrote for it by hacking around with 3Prose and some example .prose files. If anyone knows of the existance of 3Prose documentation, please send me e-mail. Likewise for anyone who is familiar with using 3Prose... there are still quite a few questions about its use.
Mint (from the Igloo IDOCS software package). This is similar to Scribe and can be used to create large, complex, documents that include graphics, various fonts, etc. (such as books).
QED seems to be used with with the PERQ AUDRE software package and appears to be some sort of WYSIWYG editor that can include graphics in a document. Is anyone who is reading this familiar with QED? More information is needed. Although I have a copy of QED, I can't use it since it asks for a password before it will work! Does anyone know how to get around this password protection or know what the format of the password for it is (number of chars, all letters or all chars, etc.)?
3Prose, loosely based on DEC Runoff. This is for creating text-only documents. It is said to be possible to use multiple fonts with this, but no one seems to recall how to do this. This appears function exactly as the POS version. This is from PERQ systems. Refer to the above POS description.
Scribe possibly ran under Accent. Does anyone know anything about this?
Mint possibly ran under Accent. Does anyone know anything about this?
There are two solutions, depending upon the exact cause of the problem. Both are simple, and one requires no spare parts.
One possible solution is to tweak the appropriate pot on the left side, from the front, of the monitor (refer to the Moniterm monitor schematics for a better description). If you don't have the monitor's schematics, the pot to be tweaked is P9, used to adjust vertical D.C. centering. There are about 6 or so small square pots in a row at the edge of the PC board. The last of these, from the front, before the first pot with a large adjustment knob, is the one to tweak.
If you're not familiar with working with high-voltage circuits, read this paragraph. Since you have to do this with the monitor turned on, you could risk being fried, zapped across the room, or you can end up with a radical new hair-style! :-) Proceed with caution; high voltages are inside the monitor. Be sure to use a non-conductive tool to adjust the pot and don't touch anything other than the adjustment tool (e.g. such as the type of tools used to make adjustments to TV sets; yo can get these at any _real_ electronics store... Radio Shack also sells them. Remember, hazardous voltages remain inside the monitor chassis even when the power has been turned off (beware of large caps and the CRT which acts as one humongous high-voltage cap! zap, Zap, crackle, ZAP!
The other possible solution is to replace the PLL chip if the above solution doesn't solve the problem.
ONLY use BYE/OFF or /WAIT with a PERQ-1. If you use it with a T2, it will move the heads to the wrong position on the hard disc. On a PERQ-1, track 0 is where the boot information block resides, and it is close to the center of the disc. On the T2's 5-1/4-inch discs, this track is near the outside of the platter. You do not want to park the disc heads in the wrong place.
POS, MPOS, Accent, PNX, Spoonix, QNIX and FLEX (and possibly others).
POS is the original PERQ operating system. It is a single process operating system. The latest known version of POS is G.7, but that was primarily used only with the 24-bit PERQ-T4 systems. G.6 was the most commonly used later version of POS. G.7 is said to have a lot of bugs in it.
MPOS is a multitasking version of POS, but it will not run on newer PERQs. A special PROM is needed to use it. This is the same situation for POS versions F2 and earlier.
Accent is a multitasking operating system developed at CMU and is the successor to RIG and predecessor of MACH. The latest known version of Accent is S7 (and is said to have some bugs in it) with S6 being the most commonly used later version.
PNX is a version of UNIX from ICL. It was not widely available in the States, but was used by many in the U.K. and Europe. The latest known version is 5.02, which only ran on PERQ's with 5-1/4-inch and 8-inch hard discs. Only versions before 3.0 ran on PERQ-1's with 14-inch hard discs.
QNIX is a version of UNIX that runs alongside Accent and uses Accent's Sapphire window manager. It was developed by Spider Systems.
FLEX is RSRE's research opersting system. It was designed around 1978 and implemented on a PERQ around 1981. FLEX is a single-user multitasking OS with a graphic user interface that feels similar to a SMalltalk or hypertext environment. This OS was implemented in microcode and uses Algol 68 as the system language. Note that this implementation was developed by the same people who implemented Algol 68R and 68RS. Although FLEX can reside by itself on a hard disc, it can live within a single large PNX file and be booted seperately from PNX.
Spoonix. Does anyone have any information about this?
There was also another version of UNIX, but the name of it excapes me at the moment. It was not widely used.
Pascal, FORTRAN, BCPL and possibly C (some C code was found on a PERQ POS hard disc).
PASCAL, Fortran, C and SPICE LISP (Known today as CMU Common LISP. The PERQ ran separate microcode for this while still running Accent; hence, you can have a LISP machine using one window and Accent programs running in another (you can also have UNIX (QNIX) running in another window).
Does anyone know of the existance of SPICE LISP version M3 that runs under Accent S6? The only thing that still appears to exist is version M2 that will only run uner Accent S5. Another question: does anyone know if version M3 will run under Accent version S6 as well as S7?
C, Pascal, FORTRAN and MicroSoft BASIC.
Algol 68.
Under POS and Accent, the FontEd program is used. MetaFont may also be used with POS. There is also a PNX utility for this.
Under POS and Accent CursDesign is used to create, edit, and display .cursor and .animate files. MetFont has been used to edit .cursor files.
Under PNX, cedra is used.
For editing .pic files, several commercial progams were available: Paint (from Advent Imaging Ltd.) and Picasso (from Prolog Software). Other commercial picture editing programs include MetaForm (from ?) and ? (from ICL). These are the .pic files used most frequently and were used by programs such as Mint (IGLOO software) and created (from a scanner) by programs such as AgfaScanner (IGLOO Software).
A program named (the one used on the Audre); this created a different type of .pic file and was not usable by other PERQ programs.
There is also a program used to view .(what?) picture files; this are not compatible with either of the above types of .pic files. Only a few .(what?) files appear to be available and are primarily scanned in images of attractive women (I should mention that they do have their clothes on.).
For CAD purposes, the program DP is used (creates .dp files). A program PicToDp is available to convert .pic files to .dp files... howver, this does not appear to work properly. There have been several different versions of DP in use, including one that came with IDOCS and crashes the PERQ very easily when the tablet or bitpad buttons are pressed (especially when making menu selections).
There is also several programs named Sketch. One of these looks like a very simplified version of Paint and Picasso. This can create graphics on the screen; however, no one seems to know how save the pictures to a file, or retrieve pictures from a file, using this.
Good question. Does anyone have an answer to this?
There are two CAD/CAM programs, from ICL (DIAD and something else). These programs use a huge amount of disc space!
The PNX demo includes programs that can display .pic, .rle and .dp files. If not mistaken, a demo program can be used to convert .pic and .rle files.
Has anyone successfully ported PBM-plus to PNX or Accent?
Very carefully. It is necessary to use the MakeBoot utility. For best results, and to avoid the possibility of making your PERQ unbootable, test the font that you intend to use on a different bootable partition or on a boot floppy. The font should be size 13 for best results.
There are several programs, such as Talker, that read .spk files. The programs used on PERQ-2, and T2, systems are not compatible with the PERQ-1 systems. Known .spk files play music as complex as that from Handel (sounds fairly good through the PERQs speaker!). The voices of people speaking have also been recorded. Does anyone have the schematics to the circuitry, and software, used to record information into these files.
There is also a program named Organ that can play simple tunes.
It is necessary to perform some hardware hacking. Some pins on the cip used for the real-time clock, on the EIO board, need to be shorted together while a special diagnostic program is run. A special test-clip was used, but I imagine other methods can be used.
There are two ways to do this under POS (both requiring the same hardware hacking). The first requires a special boot floppy containing a program to set the clock.
The second method requires two PERQs to be used; one used as a testbed and both systems must have a "link" board installed. To do this, one of the systems uses ODTPrq to load in a microcode used to set the clock.
Under PNX, it appears to be a bit simpler. The date command can be used, by root, to set the real time clock. However, this still requires some hardware hacking.
Does anyone know the proper way to perform the above?
There are basically three types of printers that can be used with PERQs: printers with serial ports (RS-232), printers that connect to a GPIB (IEE-488) and laser printers with a raw interface (a special board in the PERQ is required to drive these Canon CX printers).
The printers with an RS-232 or IEE-488 interface appear to work with POS, Accent and PNX (except for some IEE-488 connected printers). All three of the above mentioned operating systems also support the Canon CX laser printer, with the following exceptions: for POS and Accent, one must have the appropriate driver software. Note that the early versions of PNX do not support the laser printer.
For the RS-232 and IEE-488 printers, use the printing utilities supplied with your OS or the (?) program [the one Malcolm uses/wrote].
For laser printing, there are a few additional options for the POS and Accent operating systems.
For POS, the two known printing utilities are CPrint and CXPrint. CPrint prints a banner page for each printout and can cause your PERQ to crash if you invoke it again before the printer is complete finished printing a previous print job. CXPrint won't crash your PERQ; it prints no banner page, but it can, optionally, print a header at the top of each page (CPrint can't do this).
Additionally, for printing documents processed by Mint (which produces a document in XPress format), the Capri program is used; this allows the XPress files to be viewed either on the screen, or printed on a laser printer. Individual pages may be selected for printing.
For Accent, a version of CPrint is used.
I should add that for POS one can enter Shift-Ctrl-P tp produce screen-dumps to the laser printer and to some IEE-488 connected thermal printers when appropriate driver software is installed. For Accent screen dumps, one needs to open a separate window and run the CXDump program.
There are two ways to do this; one way is relatively quick and painless, but may not be possible for some to perform.
The quick and easy way to create a filesystem floppy:
The not so quick and easy way to create a filesystem floppy:
partition/build f grog foo
Where grog is the device name and foo is the name of the partition to create. Use whatever you wish in place of these, but remember that the names that you choose must be less than eight characters in length.
There are two ways to do this. One is relatively quick and easy. The other is a bit slower and slightly more complicated.
The quick and easy way to create a boot floppy is to already have access to a useable boot floppy and use the DupBoot utility to duplicate it.
The less than quick and easy way to do it is for those who don't have a boot floppy for their system, or for those who don't have the DupBoot utility. Masochists and people with nothing better to do with their time may also prefer to create boot floppies in this manner. Note that this method of creating a boot floppy also applies to those who wich to customise their boot floppies for whatever reason.
Here's how to create a boot floppy:
Follow the steps in the previous section to create a filesystem floppy.
Mount the floppy:
mo f
Copy the necessary files from your hard disc's boot partition to the floppy. The files that you will need are in the following cut-out command file. Cut out the following, place it in a file named EssentialFileCopy.Cmd and edit it for the proper device name and partition name.
	  !
	  ! Files to copy for creation of a boot floppy:
	  !
	  copy AlignMemory.Seg      grog:foo>AlignMemory.seg
	  copy Clock.Seg            grog:foo>Clock.seg
	  copy CmdParse.Seg         grog:foo>CmdParse.seg
	  copy Default.Profile      grog:foo>Default.Profile
	  copy Disk.Params          grog:foo>Disk.Params
	  copy diskdef.seg          grog:foo>diskdef.seg
	  copy DiskParams.Seg       grog:foo>DiskParams.seg
	  copy DoSwap.Seg           grog:foo>DoSwap.seg
	  copy Ethertime.Seg        grog:foo>Ethertime.seg
	  copy FileUtils.Seg        grog:foo>FileUtils.seg
	  copy Fix13.kst            grog:foo>Fix13.kst
	  copy Helper.Seg           grog:foo>Helper.seg
	  copy InitShell.Seg        grog:foo>Initshell.seg
	  copy Link.Seg             grog:foo>Link.seg
	  copy Login.Seg            grog:foo>Login.seg
	  copy PopCmdParse.Seg      grog:foo>PopCmdParse.seg
	  copy PopUp.Seg            grog:foo>PopUp.seg
	  copy PopUpCurs.Seg        grog:foo>PopUpCurs.seg
	  copy Profile.Seg          grog:foo>profile.seg
	  copy RandomNumbers.Seg    grog:foo>RandomNumbers.seg
	  copy RunWrite.Seg         grog:foo>RunWrite.seg
	  copy Sail_String.Seg      grog:foo>Sail_String.seg
	  copy Shell.Seg            grog:foo>Shell.seg
	  copy ShellDefs.Seg        grog:foo>ShellDefs.seg
	  copy System.6.Config      grog:foo>System.6.Config
	  copy System.Users         grog:foo>System.Users
	  copy UserPass.Seg         grog:foo>UserPass.seg
	  copy UtilProgress.Seg     grog:foo>UtilProgress.seg
	  !
	  ! Files for the streaming tape drive.  May be deleted if you don't
	  ! plan on using a tape drive:
	  !
	  copy stBufRead.Seg        grog:foo>stBufRead.seg
	  copy stBufUts.Seg         grog:foo>stBufUts.seg
	  copy stBufWrite.Seg       grog:foo>stBufWrite.seg
	  copy stFORead.Seg         grog:foo>stFORead.seg
	  copy stFOWrite.Seg        grog:foo>stFOWrite.seg
	  copy stut.seg             grog:foo>stut.seg
	  copy tsinterface.seg      grog:foo>tsinterface.seg
	  copy tsio.bin             grog:foo>tsio.bin
Set your default path to the floppy drive. It is imperitive that you do this before continuing. Don't say that I didn't warn you. :-)
path grog:foo
Link a few necessary files on the boot floppy:
Note that the following example is for POS G.6. If you are using a different version, substitute that version number wherever you see 6 below.
	  Link System~System.6/System
	  Link Login~Login.6
	  Link Shell~Shell.6
	  Link Link~Link.6
Run makeboot to make the floppy bootable as the floppy A boot:
MakeBoot System.6/Build a
Notes: the above steps need to be changed if you want to create a boot floppy for a system with a landscape monitor or wish to use a different default font, etc. In such cases, you'll need to run MakeBoot without the /build switch.
While the above may still be used with a landscape monitor for some purposes that do not require a full screen display (the bottom hald of the screen is unuseable), it is not suitable for all purposes. To gain use of the entire screen, refer to the File System section of the manual where the MakeBoot utility is explained. Run MakeBoot with no switches or arguments and follow the default prompts as shown, with the following exceptions:
I've posted a file named MakeBootFloppy.Cmd to alt.sys.perq and to the PERQ-Fanatics mailing list. This file simplifies much of the above and eliminates the possibilities of making mistakes that can render your PERQ unbootable.
Several things that one should be careful of are (but may not be limited to):
Hazardous voltages are present inside the PERQ-1 chassis, which is one of the reasons for the design of the PERQ2 systems. Be especialy careful poking around with the back cover removed. Of course, one should also be careful with other PERQ models as well. It is a good idea to shield these large capacitors with a plastic casing to avoid capacitor oil being sprayed all over the inside of your PERQ.
Motor starting capacitors on the hard disc of the PERQ-1 systems have been known to explode. Apparently this is more common with PERQs that run on 220/240 VAC than those that run on 110/120 VAC.
One of the capacitors on the EIO board of PERQ2 systems has been known to spark and burn.
Power supplies have been known to catch on fire on occasion (possibly due to dust?).
At present, there is a Usenet newsgroup for the PERQs as well as a mailing list (uucp/Internet) for them.
The newsgroup is alt.sys.perq. If you don't receive this newsgroup on your system, ask, beg, plead, nag or (as a last resort) threaten your system adminisrator to get him to carry this newsgroup! When I sent out the control message to start this group, I wasn't sure if it would be read by more than a handful of people, but thanks to many people who post regularly, it's become an active newsgroup! Malcolm Shute helped write the proposal for this newsgroup.
The mailing list is the PERQ-Fanatics mailing list, presently maintained on a system named hicom.org. Jamie L. Jones started this mailing list after the original PERQ mailing list started by Chris Lamb met an untimely end. To subscribe to the PERQ-Fanatics mailing list, send a message, consisting of the word "SUBSCRIBE", to perq-fanatics-request@hicom.org. After you've been subscribed, send mail to perq-fanatics@hicom.org.
Presently, there's no gateway between the newsgroup and the mailing list, although one is badly needed.
A.R. Duell has written an excellent hardware FAQ for the PERQs, and has posted it to alt.sys.perq. There are future plans to merge his hardware FAQ with this FAQ, and to add a few more bits of PERQ hardware related information.
Bill von Hagen (vonhagen@vonhagen.org) and I have been researching the PERQs for the past few years and are working on a book about the PERQs. It will be very interesting and informative reading! :-)
      PERQ-1  12 MB (14" Shugart) Winchester, 4K CPU, 256K memory, IOB I/O
      interface, VMI portrait monitor, I/O option boards were for
      Ethernet, Canon, Ethernet/Canon and Link; Boschert power
      supply.

      PERQ-1  24 MB (14" Shugart) Winchester, both 4K and 16K CPUs, 256K to
      1MB memory in the US (ICL offered this w/ 2MB), IOB I/O
      interface, Moniterm portrait monitor, (PERQ - Kriz?) portrait
      monitor, I/O option boards were Ethernet, Canon,
      Ethernet/Canon and Link; Power Components power supply.

      PERQ-1  Landsdcape (approximately 20 made), 24 MB (14-inch Shugart)
      Winchester, 1MB memory (artwork numbered 110134 or 110197),
      IOB I/O interface, moniterm landscape monitor, I/O option
      boards were for Ethernet, Canon, Ethernet/Canon and Link;
      Boschert or Power Components power supplies.

      PERQ-2	35 MB 8-inch hard drive, 4K and 16K CPUs, 512K to 1MB memory
      in the US (ICL offered this with 2MB), NIO and EIO I/O
      boards, VMI portrait monitor, I/O option boards for
      everything, NPT/Joule power supply.

      PERQ-2	Landscape, 35 MB 8-inch hard drive, 16K CPU, 1MB memory,
      NIO and EIO I/O boards (same artwork version as above),
      Moniterm landscape monitor, NPT/Joule power supply.

      PERQ-T1	(approx. 35 made) 35 MB 8-inch hard drive, 16K CPU, 1MB to 2MB
      memory, NIO and EIO I/O boards, VMI portrait monitor,
      Weir power supply.

      PERQ-T2	5-1/4-inch hard drive, 16K CPU, 1MB to 2MB memory, NIO and
      EIO I/O boards, VMI portrait or Moniterm landscape monitor,
      NPT power supply,  Kriz landscape or portrait tablet.

      PERQ-T2	5-1/4-inch hard drive, 16K 24-bit CPU, 4MB memory, 24-bit
      EIO I/O board, VMI portrait or Moniterm landscape monitor,
      NPT power supply,  Kriz landscape or portrait tablet.
The above list was provided by Bill von Hagen (I made a few very minor changes and additions to some descriptions).
Additionally, there were PERQ-3 and PERQ-5 systems (I'm not exactly sure what the differences between the two systems are offhand. I'll have to check some notes and the schematics when I get a chance). These were completely different from the other PERQs. Totally different architectures based on the Motorola 680?0 CPU. These systems were being designed when PERQ Systems went out of business. Extremely fast, high-resolution, color displays and 8MB of memory. They are (were?) manufactured by Crosfield Electronics as the Studio 9500 series systems.
The best way to preserve these systems is to post to alt.sys.perq whenever you see one that is about to be discarded, or know of any parts, software, or documentation for PERQs that someone doesn't want. Describe what you have, and provide an email address at which you can be contacted. Someone from the list will contact you, asking for these, and thanking you effusively.